Vim
While it's fully possible to execute your programs locally (directly on your computer) given that you've installed the proper tools, your grade will always be based on what your programs do when executed on the engineering servers. In certain cases, the same program can behave differently depending on its execution environment (e.g., the computer that it's being executed on). Hence, it's critical that you always execute your programs on the engineering servers so that there are no surprises during grading.
This means that you need some way of getting your code onto the engineering servers where you can execute it. You have a few options:
- (Not recommended) You can write the code locally (i.e., directly on your computer) using your favorite text editor or IDE and manually transfer it to the engineering servers whenever you make changes to it. This method is somewhat inconvenient. Still, if you want to go down this route, I recommend looking into an SFTP client (e.g., FileZilla), which is a program that allows copying of files to and from an SFTP server. SFTP is incorporated into most SSH server implementations, and indeed, the engineering servers act as both SSH servers and SFTP servers. Hence, it's possible to use an SFTP client to copy files to and from the engineering servers.
- (Recommended for work outside of this class) You can create a virtual networked file system locally (i.e., directly on our computer) and link it up to your remote engineering file space. This allows you to work with files stored in your file space on the engineering servers as if they're in a folder stored directly on your computer. For example, you could edit your source code files using your favorite text editor or IDE, and the moment you save your changes, the corresponding file on the engineering servers would be updated automatically to reflect the changes. This method requires a bit of configuration (including connecting to OSU's VPN if you want this method to work from off-campus internet networks), but it's fairly convenient once everything is set up. You can find information about how to set this up on the College of Engineering IT department's website (here's the webpage explaining how to do it on Windows, for example).
- (Recommended for classwork) You can write the code remotely (i.e., directly on the engineering servers) within an SSH session in a terminal by using a terminal-based text editor. This is the option that I'll demonstrate. It requires no configuration and will work on any machine that can connect to the engineering servers in an SSH session (even a Chromebook, in most cases). It's also strongly recommended that you go with this option since you may be tested on your understanding of terminals and shells in this class. Using a terminal-based text editor for all of your classwork is a great way to get familiar with these sorts of things. (Do not be afraid of a terminal! They're extremely powerful and every computer scientist's best friend. But using them is a skill, and it must be honed. If you have any doubts about the power of these tools, know that I wrote all of these lecture notes in a terminal-based text editor.)
- (Not recommended for this course) Some IDEs are capable of connecting to SSH servers and remotely installing additional server software to support remote development and debugging (e.g., VSCode's Remote - SSH extension). While you might be able to get these methods to work, 1) configuration can be a hastle, 2) they usually don't work as well as you'd like them to, and 3) some of these methods can bog down the servers with runaway processes, which can lock you out of your engineering user account until you manually kill those runaway processes via the sidebar in TEACH (not to mention, all of the runaway processes can slow down the servers and interfere with other students' work).
We're going with the terminal-based text editor option. The engineering servers have several terminal-based text editors already installed and available for use. We're going to use Vim. Vim stands for "Vi improved". Vi, in turn, is a much older terminal-based text editor that was created by Bill Joy at UC Berkeley in the 1970's as a part of his work on BSD UNIX. (Vi is also available on the engineering servers, but we'll be using Vim instead).
Vim has its quirks, but it's also very powerful if you know how to use it. You will often find yourself editing files on a remote system and Vim almost always available, so it is very useful to have at least a basic familiarity with it. And for the advanced features that IDEs support out-of-the-box (e.g., frontend linters to detect and highlight syntax errors), there are Vim plugins for that (e.g., this one).
All that being said, this is not a Vim course, so we'll only be using Vim in a relatively basic capacity. Open your terminal and connect to the engineering servers over SSH. Use cd to navigate to the directory where you want to write code while following along with the lectures (I recommend using mkdir to create a directory named lecture-notes inside your cs162 directory, and then navigate into it). Then, execute the following command:
vim hello.py

This command starts Vim, telling it to open the file called hello.py in your working directory (if the file doesn't exist, it will be created automatically). The moment you execute the command, your entire terminal will be taken over by the Vim user interface. It will look vaguely like this:
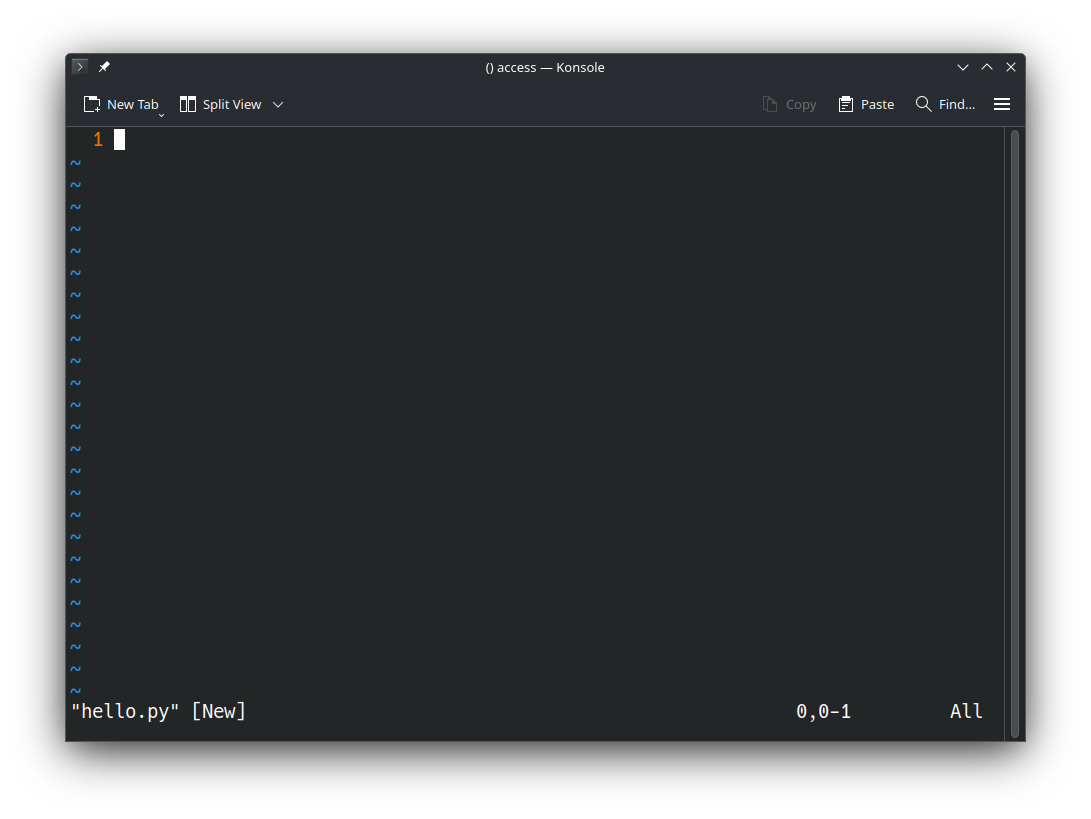
Vim is a text editor, which means it can (of course) be used to edit the file that you just created and opened (hello.py). However, at this stage, if you naively try to write some text, it won't work as you'd expect. This is because Vim has multiple modes of operation. When first opened, it will be in Normal Mode by default. In order to insert text, you must first switch to Insert Mode. You can do this by pressing the "i" key on the keyboard. After doing so, you should see -- Insert -- appear at the bottom-left of the terminal:
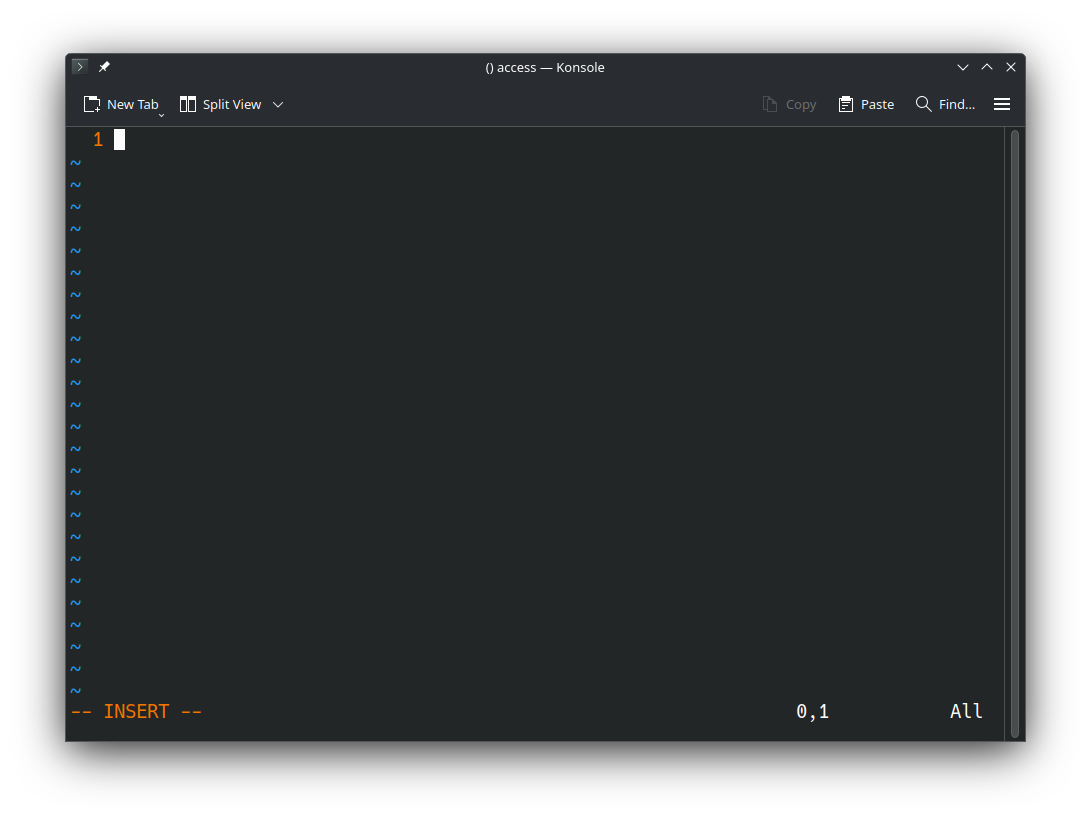
At this point, you may now start writing text into the file. I didn't tell you this, but we named the file hello.py because .py is the standard Python source code file extension, and we're going to write a brief "Hello, World!" Python program. Copy and paste the following code directly into Vim (you should be able to paste from your system clipboard into Vim via Ctrl+Shift+V in PowerShell, assuming you've enabled it in your PowerShell settings, or via Cmd+V in a Mac Terminal):
def main():
    print("Hello, World!")

if __name__ == '__main__':
    main()
We've written our code, and it's time to run it. First, we have to save the file and quit Vim. Recall that Vim is a terminal-based text editor, and recall that terminals are primarily text-based. This means that there are no menu buttons to click on to save or exit Vim (if you click the X button in the menu bar at the top of your terminal, that will exit out of your entire terminal—not just Vim). Indeed, actions such as saving and quitting require executing text-based commands. As it turns out, executing text-based commands is the entire purpose of Normal Mode (it's sometimes even referred to as Command Mode). To switch back to Normal Mode, press the escape key on your keyboard. The -- Insert -- text should disappear from the bottom-left of your terminal again.
While in Normal Mode, there are at least two kinds of commands that you can execute: a) simple hotkey commands, where you press a single key and it performs some corresponding action, and b) complete commands, which are prefixed with a colon (:). Currently, our goal is just to save and quit. There are no hotkey commands for this, so we have to execute a complete command. First, type a colon. It should appear at the bottom-left of your terminal:
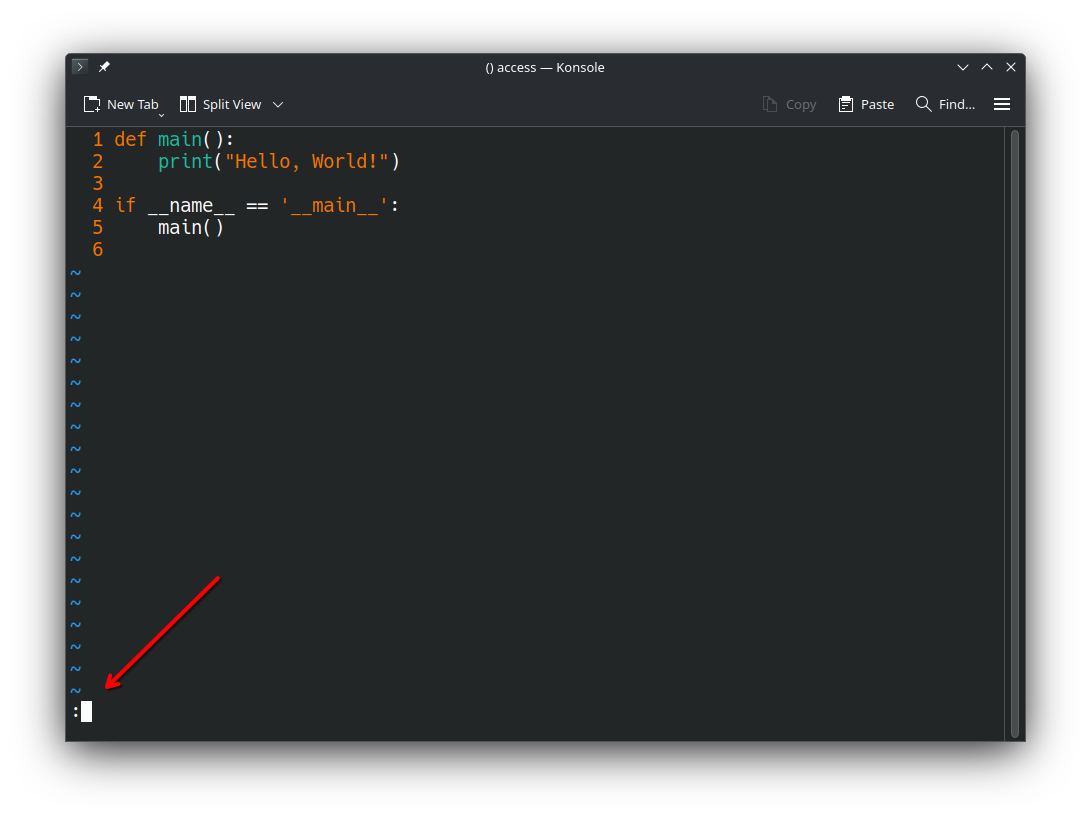
After the colon, you can type any one of various Vim commands and press enter to execute it. The basic commands that you'll use most frequently are as follows:
- :w, which stands for "write". To "write" a file means to save it.
- :q, which stands for "quit". This exits Vim. If you have unsaved changes, it won't let you quit naively. If you want to force-quit, discarding unsaved changes, you can add an exclamation point to the end (i.e., :q!).
- :wq, which stands for "write and quit". This is a special hybrid command that saves the file and immediately exits Vim. It's probably the command that you'll use the most.
There are countless other commands, some of which allow you to do much more advanced things (e.g., find and replace, enable line numbers, create macros, remap keys so that they do more complex things, etc). We'll discuss some of them shortly.
Let's save the file and quit Vim. Type wq after the colon and press enter. You should now find yourself back in your shell once again. If you execute ls, you should now see hello.py in your working directory:
(base) guyera@flip4:lecture-notes$ ls
hello.py
(This lecture isn't about Python, but if you're curious, you can execute the Python program that we just wrote by typing python hello.py into the terminal and pressing enter; refer to my "Hello, World!" Python lecture notes for more information).
If you wish to edit the file some more, simply execute the same command as earlier: vim hello.py. Since hello.py already exists, this will simply open the file in Vim for editing rather than creating it.
Some Vim tricks
That's it for the basics. Now onto some slightly more advanced Vim tricks (Vim is very powerful, but it would take several weeks if not an entire term to cover all of its capabilities, so I'll just tell you enough to bring your Vim skills up a notch and make your life a bit easier).
(If you've already configured a .vimrc file to your liking, you can skip these first few steps). First, use Vim to create and open a file named .vimrc within your home directory. It must have this exact name, and it must be in your home directory. An easy way to do this is by executing the following shell command from your terminal:
vim ~/.vimrcThe ~ is an alias for your home directory, similar to how .. is an alias for a given directory's parent, so this creates the .vimrc file in your home directory as needed. Recall that files starting with a . are hidden files, so you'll only be able to see it in your home directory later on via ls -a.
Now, copy and paste the following contents into the file within Vim (recall that you can paste while in Insert Mode via Ctrl+Shift+V, assuming your terminal configuration has been setup properly):
set nu
set mouse=a
filetype plugin indent on
set autoindent
colorscheme desert
set colorcolumn=81
syntax on
set expandtab
set tabstop=4
set softtabstop=4
set shiftwidth=4
Now save and quit Vim (press escape to enter Normal Mode, then type :wq and press enter).
Let me explain what we just did. A .vimrc file specifies a list of Vim commands that Vim should execute automatically every time it starts up. Each one of the above Vim commands enables a certain feature in Vim. By putting them in your .vimrc file, they'll be re-enabled every time you start Vim (these features do not persist, hence it's necessary to put them in your .vimrc file if you want them to always be enabled).
The above commands enable the following respective features:
- set nu: Enables line numbers. Now, Vim will display line numbers at the left of each line of whatever file you have opened, just as in the previous screenshots of my own terminal.
- set mouse=a: Enables all mouse functionality in Vim. As mentioned earlier, the mouse is generally not useful in a terminal. However, some terminal applications are capable of supporting mouse interactivity. Vim does, but you have to enable it. You can now use your mouse to scroll within a file in Vim, click somewhere to move your cursor there, highlight text, and so on.
- filetype plugin indent on, along with set autoindent: Enables some automatic indenting features, in part based on the type of file being edited (e.g., autoindents Python function bodies, if statement bodies, and loop bodies; generally maintains level of indentation when pressing the enter key to create new lines; etc).
- colorscheme desert: Changes the Vim colorscheme. There are many options. This is just the one that I use. I find it to be a nice colorscheme, at least in my terminal (a given colorscheme may look different in different terminals).
- set colorcolumn=81: Highlights the 81st column of text red in every file. A common convention in many coding style guidelines is to avoid writing any lines of code that are longer than 80 characters wide without breaking them up into more, smaller lines. The color column makes it easy to tell when you've broken that convention.
- syntax on: Enables syntax highlighting (it's disabled by default if you have a .vimrc file).
- set expandtab, set tabstop=4, set softtabstop=4, and set shiftwidth=4 together configure Vim so that whenever you press the tab key while in insert mode, it will insert four spaces instead of an actual tab character. They also assist the autoindent feature, specifying exactly how a level of indentation should be represented. Finally, they make it so that Vim commands that shift over by a level of indentation will shift over by four spaces. All of this is fairly common practice in Python development.
These settings alone will surely make Vim easier to use, but you'll be even more proficient if you can master some of the (slightly) more advanced commands and hotkeys detailed below. (Keep in mind that many hotkeys and commands are case-sensitive. For example, pressing the U key while in Normal Mode with caps lock off will do something different from pressing the U key with caps lock on).
- To undo in Vim, simply press the (lowercase) u key while in Normal Mode (recall: you can enter Normal Mode by pressing the escape key).
- To redo, press Ctrl+r while in Normal Mode
- Although you can paste directly from your clipboard into Vim by pressing Ctrl+Shift+V while in Insert Mode (in most terminals), you cannot trivially copy from Vim directly to your system clipboard. Instead, Vim has its own internal buffers in which it stores text copied via special Vim commands. The text from these buffers can be pasted via special Vim commands as well.
- To copy the entire line that your cursor is currently on into Vim's internal default copy buffer (i.e., its internal clipboard), press the (lowercase) y key twice in a row while in Normal Mode.
- To copy N lines of text starting with the line that your cursor is on, while in Normal Mode, type in the number of lines that you want to copy, and then press the (lowercase) y key twice in a row.
- Since your mouse is enabled in Vim now, you can highlight text in Vim by clicking and draging over it. Doing so will enter Visual Mode (yes, there are indeed more modes besides just Normal Mode and Insert Mode). You can alternatively enter Visual Mode by pressing the (lowercase) v key. When text is highlighted in Visual Mode, you can press the (lowercase) y key to copy it to Vim's default copy buffer.
- To paste whatever text is currently in Vim's default copy buffer, simply press the (lowercase) p key while in Normal Mode.
- In all of the copying hotkeys above, replacing the (lowercase) y key with the (lowercase) d key will achieve the same result, except the respective text will be cut instead of copied.
- Pressing the (lowercase) o key while in Normal Mode will insert a new line below the line that your cursor is currently on and immediately enter Insert Mode. Pressing the (uppercase) O key instead will insert a new line above the line that your cursor is currently on and immediately enter Insert Mode.
- While in Normal Mode, pressing (lowercase) g twice in a row will jump the cursor to the very first line in the file. Pressing (uppercase) G once will jump the cursor to the very last line in the file. Typing a number followed by an (uppercase) G will jump to the line matching the number typed (e.g., typing 5G while in Normal Mode will jump to line 5).
- Okay, last one. Vim supports a find-and-replace feature. It's a complete command, meaning it's prefixed with a colon (:) while in Normal Mode. After the colon, type %s/. Next, type the (case-sensitive) text that you'd like to find and replace throughout the file, followed by another /. Next, type the text that you'd like to replace it with, again followed by a /. Finally, type gc, and press enter.
Here's a complete example:
:%s/hello/goodbye/gc
This would step through each of the occurrences of the word "hello" in the file and ask you if you'd like to replace it with the word "goodbye". To replace an occurrence, press the y key (for "yes"). To skip an occurrence (leaving it as-is), press the n key (for "no"). To stop the find-and-replace command at any point, press the q key (for "quit").
There are a few more options here as well. The "c" at the end of the find-and-replace command stands for "confirm". If you omit it, Vim will instantly replace all occurrences as if you pressed the y key for each one of them.
The % symbol at the beginning means "search the entire file". If you want, you can instead write .,$ (that's a period, then a comma, then a dollar sign) in place of the % symbol. This means "search the entire file starting from the line that my cursor is on". This is especially helpful for, say, renaming a local variable within a single function.
Again, there are countless more Vim commands and hotkeys that we don't have time to cover. If you want to improve your Vim skills beyond what's covered in this lecture, I recommend studying Vim mappings, macros, abbreviations, and, if you really want to get your hands dirty, plugins and plugin development.